How To: Bias Binding
This is on the list of things I wish I'd figured out ages ago. In an effort to remind me to make my own and to share the wealth, here's some basic instructions!
Materials:
Fabric
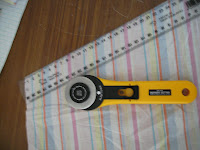
Rotary cutter or Scissors (if you use scissors, tailor's chalk will be necessary as cutting beside a ruler will drive you mental)
Ruler
Instructions:
~Find the grain of the fabric (usually running parallel to the selvage edge of your fabric - the sealed side not the one they cut in the shop)
~ Draw a line at 45 degree angle from this.
~ Cut along the line (or just run your rotary cutter alongside the ruler)
~ Cut the desired width - I like using the width of my ruler.

 Et voila - your own bias binding!
Materials:
Fabric
Rotary cutter or Scissors (if you use scissors, tailor's chalk will be necessary as cutting beside a ruler will drive you mental)
Ruler
Instructions:
~Find the grain of the fabric (usually running parallel to the selvage edge of your fabric - the sealed side not the one they cut in the shop)

~ Draw a line at 45 degree angle from this.
~ Cut along the line (or just run your rotary cutter alongside the ruler)
~ Cut the desired width - I like using the width of my ruler.

 Et voila - your own bias binding!


Comments
Post a Comment